Table of Contents (15 sections)
Light is the lifeblood of photography. In artistic photography, understanding its manipulation can lead to incredible images that evoke emotion, convey stories, and invite viewers into the photographer's vision. This article will delve into the various techniques photographers use to harness light effectively, ensuring your artistic expression stands out.
1. Understanding the Basics of Light
What is Light?
Light, a electromagnetic radiation that can be perceived by the human eye, is crucial in photography. It interacts with subjects differently based on the time of day, weather conditions, and geographical location. Understanding these interactions is foundational for any photographer aiming to create impactful images.
Key Elements of Light:
- Quality: Refers to the softness or harshness of the light. Soft light is diffused, reducing shadows, while hard light creates strong contrasts.
- Direction: The angle at which light hits the subject creates depth and dimension.
- Color: Different light sources emit varying color temperatures measured in Kelvin.
For instance, using warm light during the golden hour enhances skin tones and creates a welcoming atmosphere. Conversely, cooler light can bring a sense of calm and tranquility. Understanding these fundamentals enables you to utilize light creatively in your work.
2. Harnessing Natural Light
Techniques to Utilize Sunlight
Natural light is a photographer's best friend. Its availability and direct implications on mood and tone can significantly affect artistic output. Here are some essential techniques for using natural light effectively:
- Golden Hour: Shooting during the golden hour—the hour after sunrise and before sunset—yields photographs with soft, warm tones.
- Backlighting: Positioning the subject in front of a light source creates a halo effect around the subject, adding drama and depth. Use this technique for portraits to create ethereal looks.
- Reflectors: Enhance the light on your subject's face by bouncing sunlight with reflectors. This method is particularly effective in controlling shadows in portrait photography.
Common Mistakes:
- Shooting in harsh midday sunlight without considering the shadows it casts can flatten your image. Always seek cover or diffuse the light to avoid unflattering contrasts.
Pro Tip: Experiment with different times of day and conditions—cloudy days provide even lighting conditions that can enhance details in your photos.


3. Utilizing Artificial Light
When and How to Incorporate Flash or Continuous Lighting
Sometimes, natural light alone isn’t sufficient. Artificial lighting can be vital for achieving the desired artistic effect.
- Flash vs. Continuous Lighting:
| Criteria | Flash | Continuous Lighting | Verdict |
|--------------------|----------------------------|--------------------------------|-------------------------|
| Light Duration | Short bursts; freezes motion| Ongoing illumination | Based on needs |
| Control | Very high | Moderate control | Depends on scene |
| Mobility | Requires batteries or power | Easily portable | Both options are viable |
| Lighting Quality | Hard light unless diffused | Varies, soft options available| Light source choice matters|
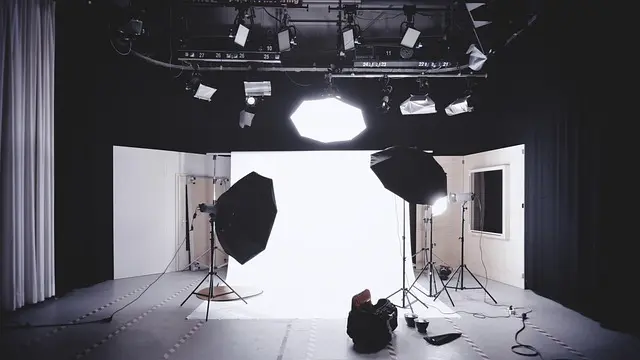
To create depth, mixing both types can yield remarkable results. For example, use a flash to fill shadows while maintaining the natural light's ambiance. Photographers often use softboxes or diffusers to soften harsh light from flash, allowing for more subtle transitions.
Checklist for Using Artificial Light:
- [ ] Select the right light source based on your subject.
- [ ] Use modifiers (like umbrellas or softboxes) to convert hard light.
- [ ] Consider the color temperature and make adjustments in post-processing if necessary.
4. Mastering Light Editing Techniques
Post-Processing Light Adjustments
In today's digital landscape, editing light is just as critical as capturing it. Techniques include:
- Adjusting Exposure: Increasing the exposure can brighten dark images, while decreasing it can create moody tones.
- Using Curves: Adjusting highlights and shadows with curves can make your images pop. This tool allows nuanced adjustments to specific light levels within the image.
- Color Grading: Fine-tuning the color temperature helps convey the mood—warmer tones often induce warmth and comfort, while cooler tones can suggest calm and distance.
Common Pitfalls:
- Over-editing can lead to unnatural images. Strive for a balanced approach where images feel both edited and authentic.
Tip: Familiarize yourself with the histogram feature in editing software. It visually represents how light is distributed across your image, helping you fine-tune adjustments efficiently.
5. Experimenting with Light
Embracing Creative Opportunities
Creativity thrives on experimentation. Whether it’s manipulating shadows, adding colored filters, or using multiple light sources, the artistic potential is limitless.
For example, utilizing colored gels over lights can evoke mood—use blue for serenity or red for passion. You can also play with shadows and leads them creatively by ensuring they complement your composition.
- Light Trails: For night photography, long exposures capture light trails, adding dynamic energy to landscapes or city scenes.
- Spotlight Effects: Focus light on specific areas while minimizing distractions in the frame.
Embracing mistakes is also part of the artistic journey. Each misstep teaches invaluable lessons about light and its effects.
Conclusion
Light has a profound impact on artistic photography. By mastering its various aspects, from natural to artificial, and enhancing it through editing, you can dramatically elevate your photography. Remember, the key is practice and experimentation. Happy shooting!
🧠 Quiz rapide:
What is the best time of day for natural light photography?
- A) Midday
- B) Golden hour
- C) Night
Réponse : B — The golden hour provides soft, warm lighting ideal for artistic photography.
Checklist avant achat
- [ ] Understand the qualities of light.
- [ ] Master natural light techniques.
- [ ] Learn to use flash and continuous lighting effectively.
- [ ] Familiarize yourself with editing tools.
- [ ] Experiment creatively.
Glossaire
| Terme | Définition |
|---|---|
| Luminosité | Mesure de la quantité de lumière visible. |
| Diffusion | Processus par lequel la lumière est étalée pour devenir plus douce. |
| Histogramme | Graphe représentant la luminosité d'une image, indiquant les zones sombres et lumineuses. |
---
📺 Pour aller plus loin : artistic photography lighting techniques 2026 sur YouTube
Recommended products
Selected by our experts
'Quarto 1' Framed Wall Art 24''x24'' by Ackerman
cb2.com
This framed wall art serves as a stunning example of artistic lighting, inspiring your own photography.
Surratt Artistique Liquid Blush Cantaloup
bluemercury.com
This liquid blush is an ideal choice for beauty photography, highlighting natural skin tones beautifully.
Surratt Artistique Blush La Rosee du Soir
bluemercury.com
This blush can enhance portraits, providing a natural warmth that complements artistic lighting techniques.